

Proper chain adjustment is crucial for maintaining performance, preventing excessive wear, and ensuring smooth power delivery. Follow these steps to keep your Cobra CX65 running at its best.
Tools Required:
✔ 22mm wrench or socket
✔ 2 x 11mm open-end wrenches
✔ Clean rag
Step-by-Step Chain Adjustment Guide
🔧 Step 1: Ensure Rear Wheel Alignment
- Before making any adjustments, check that the rear wheel is properly aligned.
🔧 Step 2: Check Chain Free Play
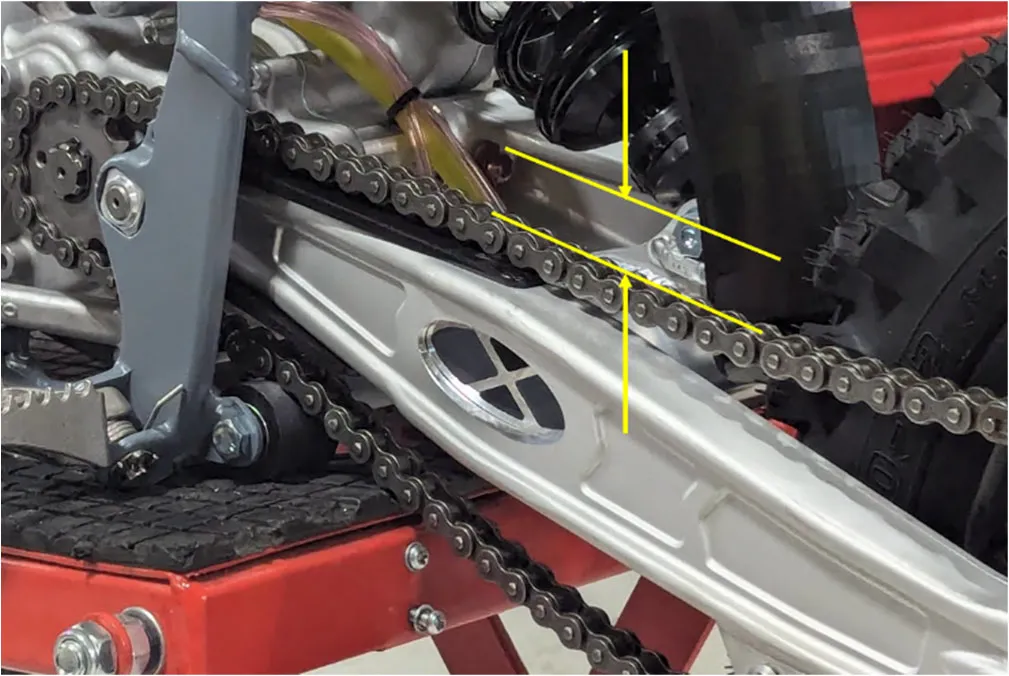
- With no load on the bike, the chain should have 35mm of free movement just behind the chain block. (figure 2)
- CAUTION: Sit on the bike and verify that the chain still has at least 12mm (½”) of free movement at its tightest point.
🔧 Step 3: Loosen the Axle and Adjust the Chain
- Use a 22mm wrench to loosen the rear axle nut.
- Use an 11mm wrench to loosen the jam nuts on the chain adjuster bolts.
- Adjust the chain:
- Tighten the chain by turning the adjuster bolts clockwise (CW).
- Loosen the chain by turning the adjuster bolts counterclockwise (CCW).
🔧 Step 4: Secure the Chain Tension
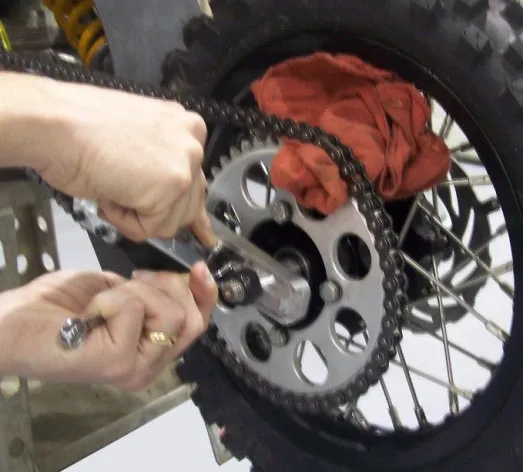
- Place a rag between the chain and rear sprocket and roll the wheel backward—this ensures the adjuster blocks are pulled tightly against the adjuster bolts. (figure 3)
🔧 Step 5: Retighten All Bolts
- Tighten the axle bolt to 34 Nm .
- Retighten the adjuster jam nuts to secure the adjustment.
⚠ CAUTION: Always check and adjust the rear brake free play after adjusting the chain to ensure proper braking performance.
